donderdag 27 juni 2013

Moelleux Au Chocolat: Day 2

Today I'm going to use another recipe:


- 170 g chocolate
- 3 eggs
- 120 g sugar
- 55 g flour
- little bit salt
- 150 g butter

In little cups at 200 °C after having put them in the fridge for an hour.

I have 5 little cups and I will take them out of the oven one by one to see what happens during the course of time. At least one of them will be baked well enough to have this gooey inside.


Result:
This is very difficult to make. I didn't preheat the oven properly, next time I wait till the oven is exactly at 200 °C. It was still heating up while the cakes were in the oven. Even so, the amount of time the cakes need to be in the oven is very exact to the minute. One minute over time and your inside has become solid. This is what happened this time. I put it in there for 10 minutes and probably had to put it in there for 7 to 8 minutes.


maandag 24 juni 2013

Moelleux Au Chocolat: Day 1

This is a difficult one, especially the baking of it. You want it crispy outside and soft inside.

Here's the recipe:
80 g chocolate
3 eggs
150 g sugar
40 g flour
100 g butter

I'm going to try using 1 egg, so I divide by 3. And I'm going to cut back on the sugar.

I mix together the chocolate and the butter. I mix together the sugar and the egg. Then I add flour to the egg/sugar mixture. Finally I add chocolate and butter to the entire mixture.

This is what I got:


Now I put it in a 180-210 °C oven in a tiny, buttered, moelleux ceramic cup for about 15 minutes. (It will be better if you put it in the fridge for a few hours, but I don't want to wait. The reason it's better is because the inside will be cold and the outside will be warm. So the inside will be soft and sticky, while the outside is hard. We will get a nice gradient from inside to outside.)


And we get the result.


Hmm, I baked it a little bit too long. 16 minutes. Next time we do it with 10 minutes and I'm going to put it in the fridge first. I also think the cake is too soft on the outside, so next time I'm going to use 200 °C instead of 180 °C.

Some other recipes are totally different:

- 170 g chocolate
- 3 eggs
- 120 g sugar
- 55 g flour
- little bit salt
- 150 g butter

This second recipe looks a bit "darker" because it uses more chocolate. I think I'm going to try this one next time.

To see how I make the second recipe, go here:
http://katchum-kitchen.blogspot.be/2013/06/moelleux-au-chocolat-day-2.html

vrijdag 21 juni 2013

Gratin Dauphinois - Gratin of Potatoes: Day 2

I have retried making it. I did just the same, but now with 30% cream instead of 7% cream.
I still used a metal pan, just to see if the culprit was the cream itself.

As I suspected, it was the light cream all along. It wasn't the metal pan. The only mistake was that I didn't use full cream. But this time, I used full cream and the result was very good. I did use too much sauce this time, next time add as much milk/cream mixture to the level that you don't cover the potatoes entirely.

This might look gross, but it is very tasty. The sauce hasn't separated, but is very thick and creamy.

The thick sauce is bound together


Unlike the first time, where the sauce separated.

You can see that the sauce is shifted into water and fat particles

Go here to learn how to make Gratin Dauphinois.

zondag 16 juni 2013

Luikse Wafel: Day 2

Ok, I made the yeast dough.


Then we just knead the dough and add those together. Let's hope it works!

I had to add a little bit more flour, because it was too sticky. Mixing the pearl sugar wasn't easy. Some parts had too much sugar. So I had to distribute them from highly concentrated sugar parts to less concentrated sugar parts.


Now let's see what the result is.


The caramelization was ok. But the dough wasn't like it should be, I missed the stretchiness of the dough. Also, the recipe used too much sugar to my taste. It was like eating sugar instead of waffles.

Conclusion: it's better to buy one than to make one... I'll leave it to the professionals.


If you still want to make it yourself, here are the instructions.

zaterdag 15 juni 2013

Balsamic Mushrooms

A very fast recipe for balsamic mushrooms. Basically you just pan fry the mushrooms and add balsamico acid. Parsley works best with this dish.

You can also add a toast with the mushrooms, we call it "Toast Mushroom". Ideal for breakfast.


Gratin Dauphinois - Gratin of Potatoes: Day 1

Gratin Dauphinois is very easy to make, but you need to make sure you do the right things. This recipe is basically potatoes with cream and cheese, baked in the oven.


So the ingredients are:
- potatoes
- milk
- heavy cream (not light cream)
- pepper
- salt
- nutmeg

Make sure you slice your potatoes as thin as possible and do not wash them after slicing them. Second, make sure you use warm milk/cream in same amounts. If you don't use same amounts of milk and cream your dish will not work. I once tried it with cream only and the result was a lumpy gratin dauphinois, because all the water evaporated and the fat was left over in the gratin. If you use too much milk on the other hand, you will get a watery gratin dauphinois. And keep in mind that you add enough milk/cream just to cover all the potatoes. You bake it at 180 °C for about 30 minutes.

Watch in this video how I make the potato gratin:


I baked it for too long and I used too few cream/milk mixture. The potatoes were dry and the cream was separated into fat and water. That shifting is caused by a temperature above cooking temperature. Next time, I add more cream/milk. Do not let it dry out. Also, do not use light cream, but full cream (I used light cream of 7% fat because I didn't have anything else). The reason why you need to use full cream is because the lower the fat percentage, the more chance there is that the cream will separate. So use a high fat percentage to put in the potato gratin. You will need at least 30% fat percentage of cream. Additionally, I didn't use the right baking pan, next time I use ceramics instead of metal, because metal is too high in heat transfer. The sides will overcook and the cream will separate as a result of this. Cream does NOT like high heat. (and those behind the gratin are balsamic mushrooms, which I also have a recipe for)

Hint: bake the potato gratin until you can use a stick and push through the gratin without any resistance.

You can see that the sauce is shifted into water and fat particles

I'm going to make this again later on, with full cream and with a ceramics baking pan. I'll give you an update about the end result. Speaking about cooking for dummies. I'm in that category, but I'm learning.

Interesting to read about the fat percentage: 

I have made it again here and I was successful.


donderdag 13 juni 2013

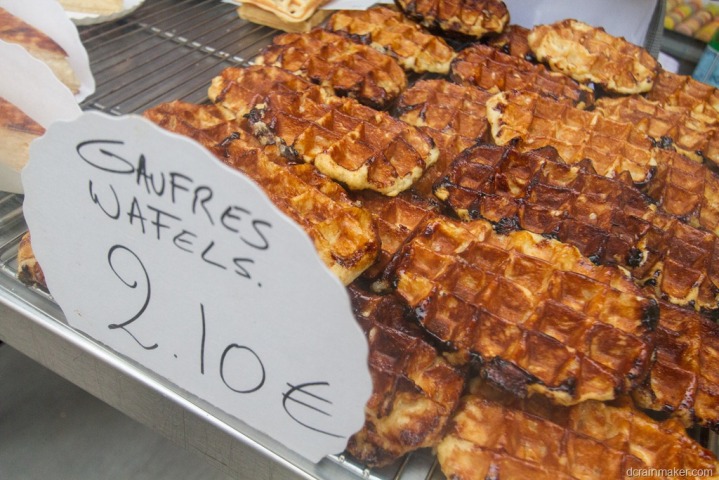
Luikse Wafel: Day 1: Assessment

My next project will be the "Luikse Wafel". I have tried many times to make the real "Wafel" from Belgium, but have never succeeded. I think I didn't use the right ingredients. Each time I made them, I couldn't get the stickiness of the wafel right. It just wasn't sticky, meaning, the caramel didn't come out right. And it was much too hard. A good Luikse Wafel should be tender from the inside and sticky on the outside. The temperature is also important, you need to bake it at 180°C for the pearl sugar to melt, the baking time is 3 minutes. Also very important is the waffle iron. It needs to have thick grating, otherwise you won't get the tenderness inside.


Let's go over the ingredients first and make a comparison of different recipes:

All of the recipes contain the following ingredients:
  • water
  • yeast (amount of fresh yeast, or half the amount dried yeast)
  • flour
  • sugar
  • eggs
  • butter
  • pearl sugar
Some of the recipes use milk.

Let's make a comparison between the amounts:


What's odd is that patisserie.be uses a lot of liquid, almost twice as much as SOS Piet (after normalization). Another interesting thing is that Alpha Core uses a lot of eggs, probably making a yellow kind of waffle, which is not the one I'm looking for. Kleine Keuken doesn't use sugar in the dough itself and is worth noting. And it's funny that SOS Piet doesn't use milk while all others do. 

With all of these different recipes it's difficult to choose the best one out. 
I'm going for the recipe of Patisserie.be because they look like the real ones.

Now for the real work, how do you make them?
First you make the dough from the flour, yeast, water, milk, eggs and fine sugar. Let it rest for half an hour. Then add the rest of the flour, butter, pearl sugar. Let it rise a bit and then bake.

See this video of SOS Piet.


A more detailed description:
1) Add the 300 g milk + 200 g water + 75 g yeast in a cooking pan and dissolve on low heat
2) Mix together: 800 g flour + 50 g fine sugar + 2 eggs
3) Mix 1 and 2 together
4) Let it rise for 30 minutes
5) Add the 200 g flour + 500 g butter (+ optional salt)
6) Knead until you get a dough
7) Add 600 g pearl sugar, cut it in small pieces and let them rest for 15 minutes
8) Bake on a buttered waffle iron

This recipe is for 10 people, so divide by 10 if you're the only one who's going to eat it.

Stay tuned for the results. Go to day 2.

vrijdag 7 juni 2013

Cheesecake

My project today will be Cheesecake. For New York Cheesecake go here.


Here's how a professional cook makes it:


But here's an easier version: I got this recipe from a colleague of mine and it's pretty easy to make.

You will need:
- 200 g of sugar (I'm going to use 150 g because I don't like it to be so sweet)
- 125 g of butter
- 3 eggs
- 1 pod of vanille
- 2 tea spoons of pudding powder
- lime juice
- 500 g of full farmer's cheese (which is basically thick yoghurt with a lot of fat)
- crumb pastry

Make sure everything is at room temperature!!! Otherwise you will get lumps.


1) Put the sugar, butter, vanille, pudding powder in a bowl.
2) Add 1 egg and mix it
3) Add 1 egg and mix it again
4) Add 1 egg and mix it again till it is smooth
5) Add the lime juice to it (don't forget to taste the mixture)
6) Add the farmer's cheese
7) Put the mixture in your crumb pastry
8) Bake it at 180° C for 55 minutes
9) Let it cool down
10) Put it in the fridge

This is the result after baking:

And this is the result after a day in the fridge:


=> Eat!

woensdag 5 juni 2013

Tiramisu: Day 2

Oh my God! Are the only 3 words I have. I am speechless.

The tiramisu came out perfectly, the paste was sooooo smooth and the color was actually white!

The lady fingers turned into "cake" like substance and I couldn't believe it turned out so well.


The Tiramisu quickly went into the stomach and disappeared in a jiffy.


Go here to find out how to make Tiramisu.

dinsdag 4 juni 2013

Tiramisu: Day 1

I have never made Tiramisu, but want to master it.

So let's experiment.

The recipe I'm using comes from SOS Piet. I divided it by two because I can't eat it all:
- 2 egg yolks
- 1.75 egg whites
- 4 table spoons of sugar
- 250 g mascarpone
- coffee
- ladies fingers
- cacao

It's easy to look at people making it, but actually doing it yourself is another task.

1) First I separate the eggs into two bowls with each 2 table spoons of sugar.


2) Then I mix the egg yolks until I get a smooth paste.


3) Next on, I do the same with the egg whites.


4) I mix the mascarpone with the egg yolk.


5) I mix it with the egg white. It becomes fluffy and whiter.


6) We put the lady fingers in coffee and then in the flat bowl.


7) We put a layer of the paste onto the lady fingers.


8) Second layer of lady fingers and on top of that we put the last layer of paste.


I found out that it's best to fill the entire bowl, otherwise the paste will slide off the tiramisu. Next time I'm going to cover the entire plate, that will give us a nicer tiramisu.

9) We put this in the fridge and wait a day.

10) Next on, we put the cacao on the tiramisu and it is ready to serve.

Go here to see the result!